Twilio SMS & Zoho CRM Extension Installation & Authorization
Step 1: Go to Zoho marketplace
and
install the extension following the below steps.
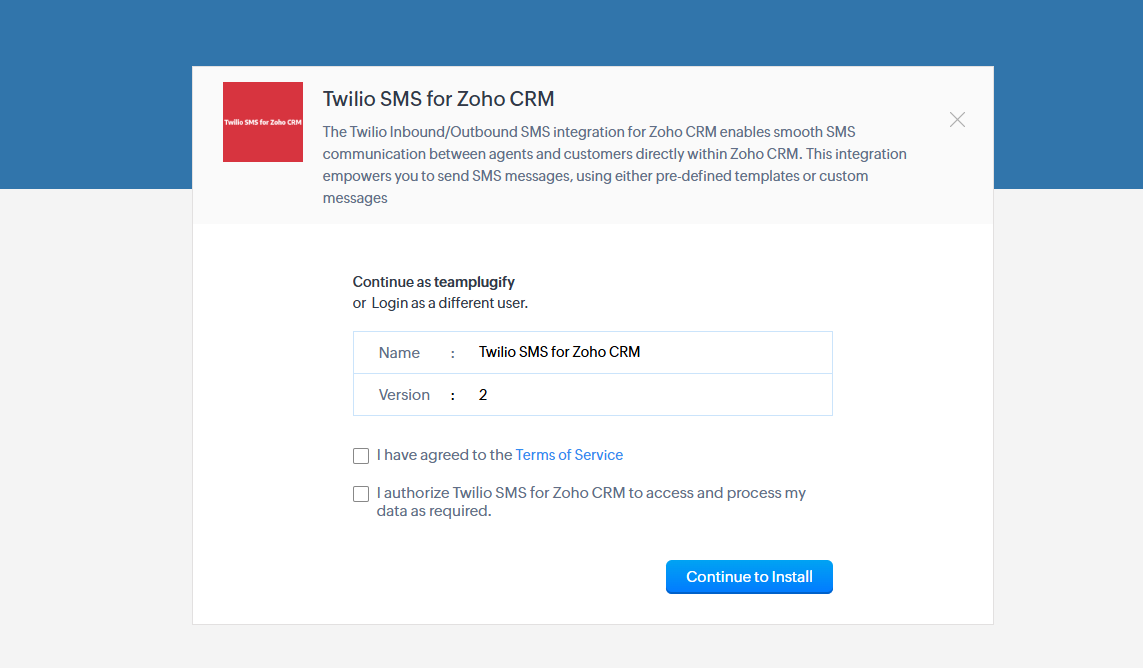
Step 2: Select the checkbox to agree to the terms and conditions and click
Continue.
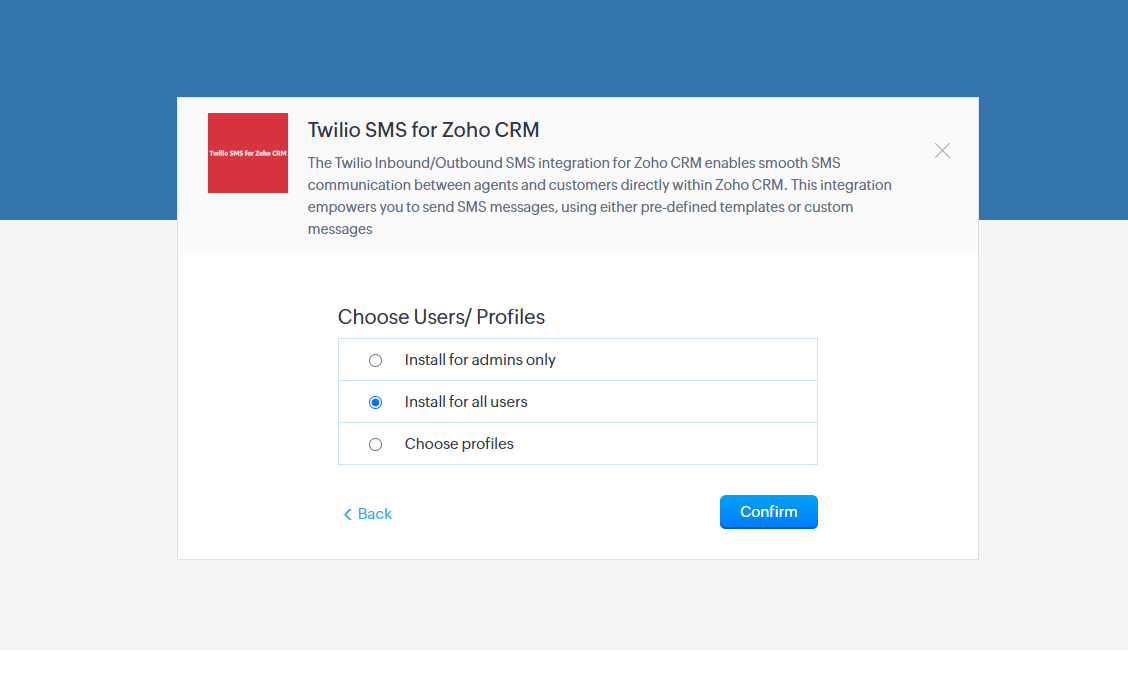
Step 3: Choose the profiles to whom you want to install the application in Zoho CRM and
click Continue.
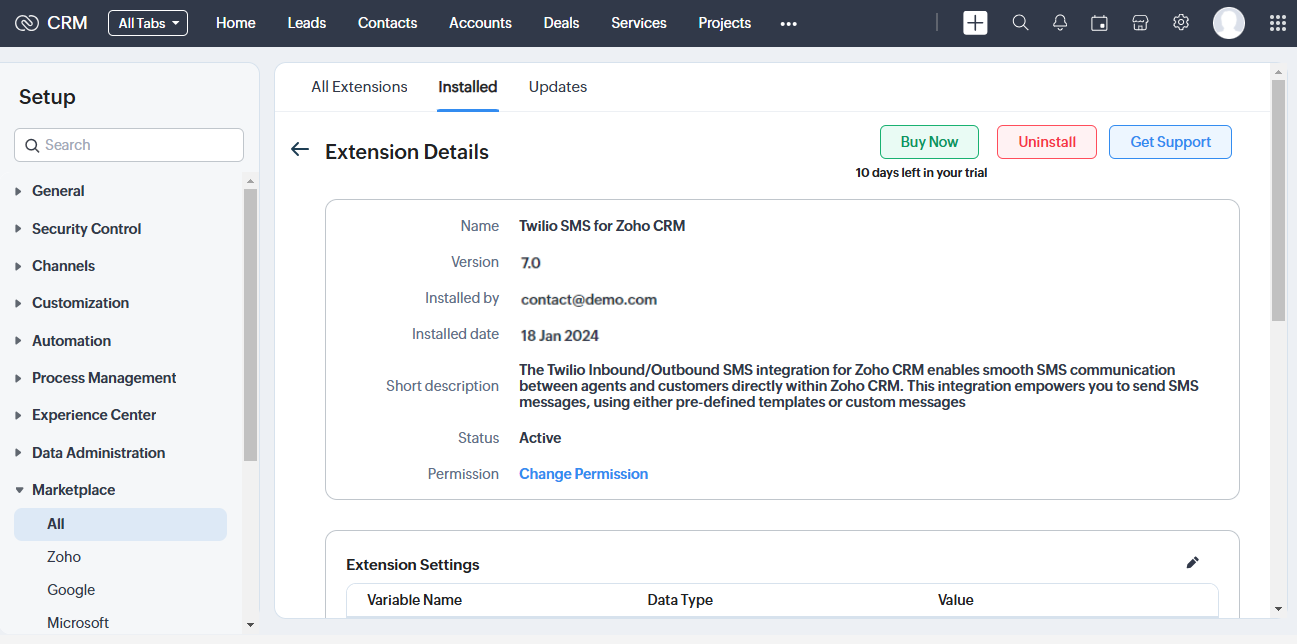
Step 4: Once the extension has been successfully installed, the following window will
appear.
Step 5: To authorize the extension, click the Edit icon in the extension settings. Then, provide the following details:
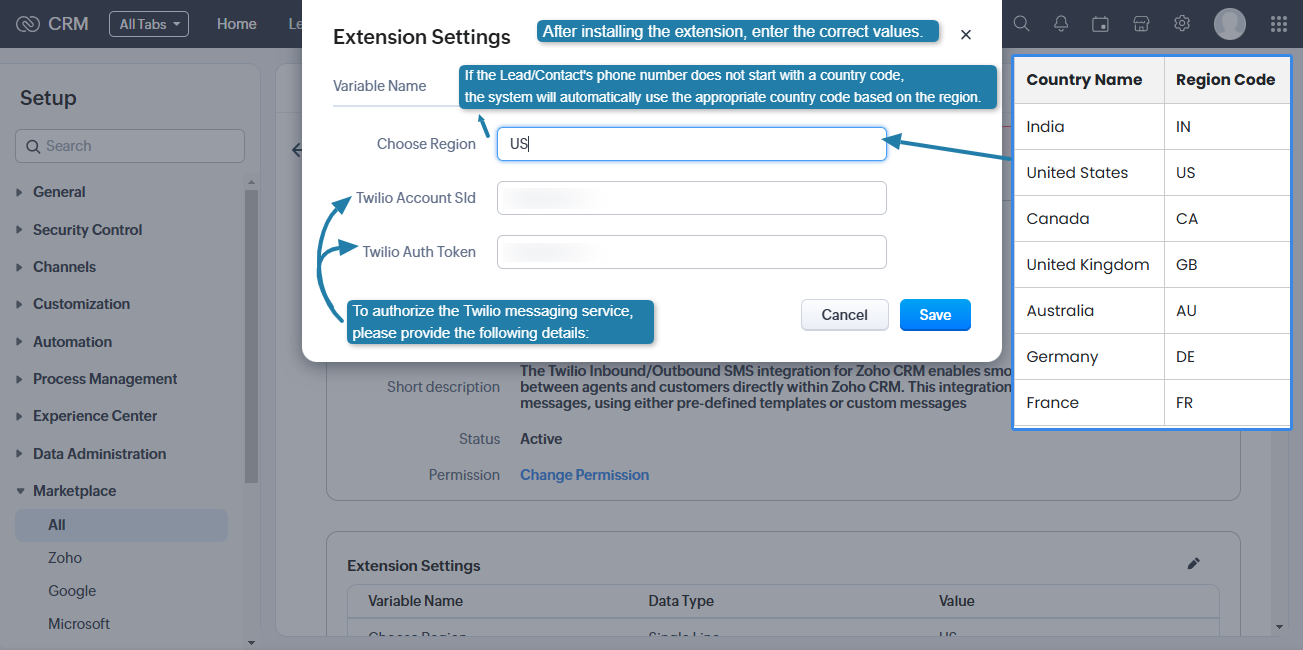
- Region:
- Enter your Twilio Region Code in the designated field.
- You can find your Region Code in the attached screenshot below
- Twilio Account SID:
- Your Account SID is a unique identifier for your Twilio account.
- Log in to your Twilio Console.
- On the Dashboard, your Account SID will be visible on the main page, usually under the Project Info section.
📷 See Step 6 screenshot for reference. - Twilio Auth Token:
- The Auth Token is used to securely authenticate your integration with Twilio.
- In the same Twilio Console, under the Project Info section, you’ll find your Auth Token next to your Account SID.
- You may need to click the eye icon to reveal the token.
📷 See Step 6 screenshot for reference.
Step 6: Log in to your Twilio account and navigate to the Twilio Dashboard
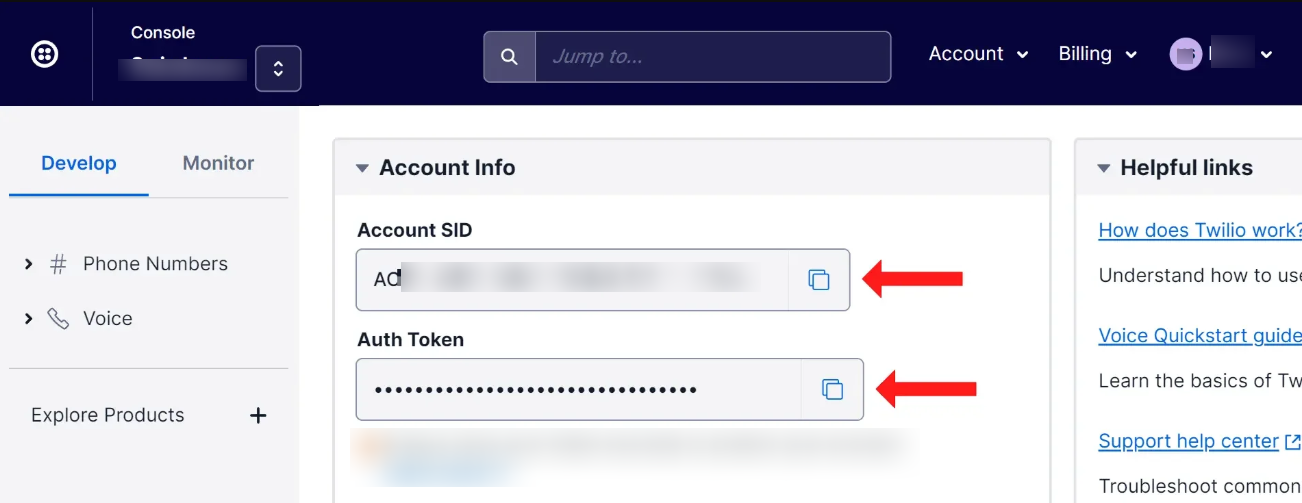
📷 Refer to the screenshot below for a visual guide to the Twilio Dashboard layout.
On the dashboard, you’ll find the necessary details such as your Account SID & Auth Token (as
referenced in Step 5).
Step 7: If you do not have a sender number, you will need to purchase one by clicking the
"Buy a Number" button, as shown in the screenshot below.
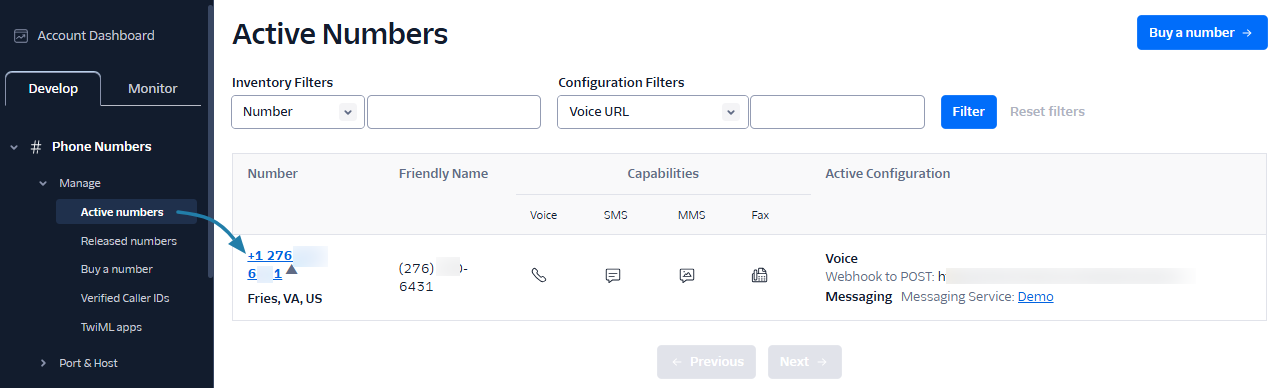
📍 Click here to navigate
directly to the page where you can purchase a Twilio number.
Step 8: Once you have saved all the required information in the extension settings and
your Twilio number is active, you can proceed to the next step.
You’re now ready to send SMS messages directly from Zoho CRM modules such as Leads, Contacts, Accounts, and Deals, using the following options:

You’re now ready to send SMS messages directly from Zoho CRM modules such as Leads, Contacts, Accounts, and Deals, using the following options:
- One-on-One SMS
- Bulk SMS
Step 9: Navigate to the "Leads" module in Zoho CRM and open a specific lead
record. Inside the lead view, click on the "Send Twilio Message" button.
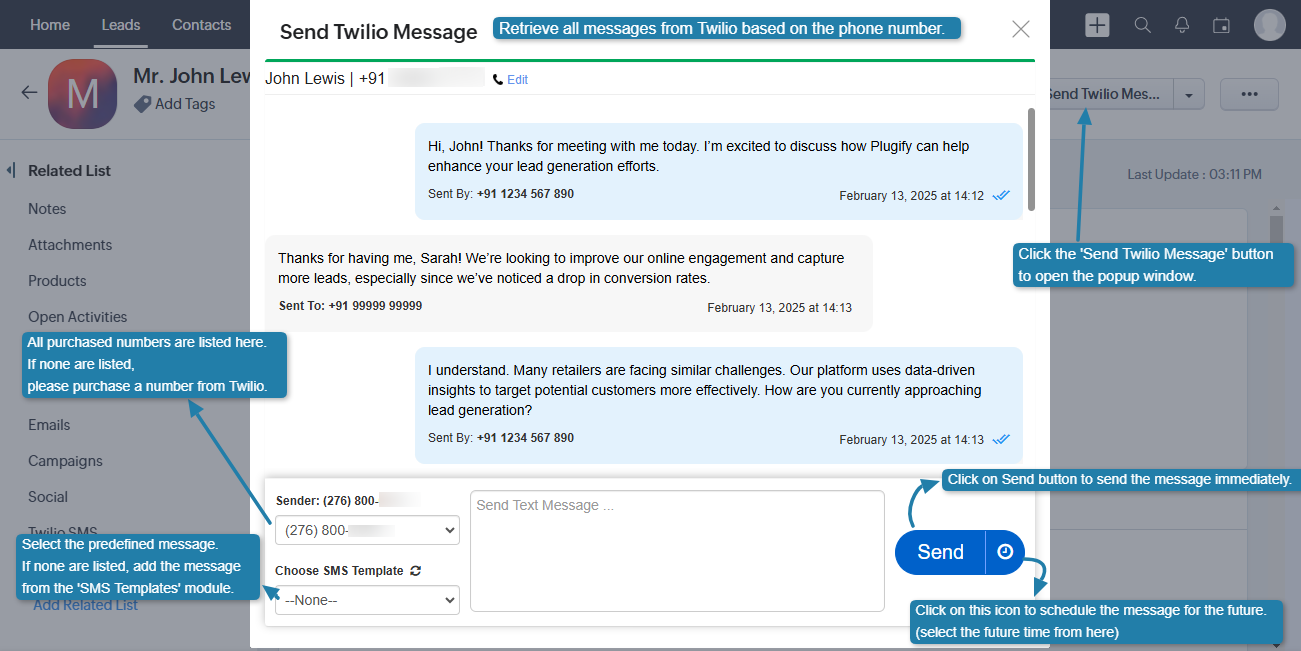
📷 Refer to the attached screenshot to locate the "Send Twilio Message" button and popup interface.
Once clicked, a popup window will appear, allowing you to send SMS messages using either
a custom message or a predefined SMS template.
Within the popup, you'll find two dropdown menus:
- Sender Number Dropdown:
This dropdown lists your Twilio sender numbers. Select the number you purchased earlier. - SMS Template Dropdown:
This dropdown contains all your predefined SMS templates. You can select any template from the list.
After selecting the appropriate options, you can:
- Type a custom message,
- Or select an SMS template, click on the refresh icon next to the template selector to reload and fetch all available templates.
- Then click the "Send" button to send the message immediately,
- or click the watch icon (🕒) next to the Send button to schedule the SMS for later delivery.
Step 10: After clicking the watch icon (🕒) next to the Send button, a scheduling popup
window will appear.
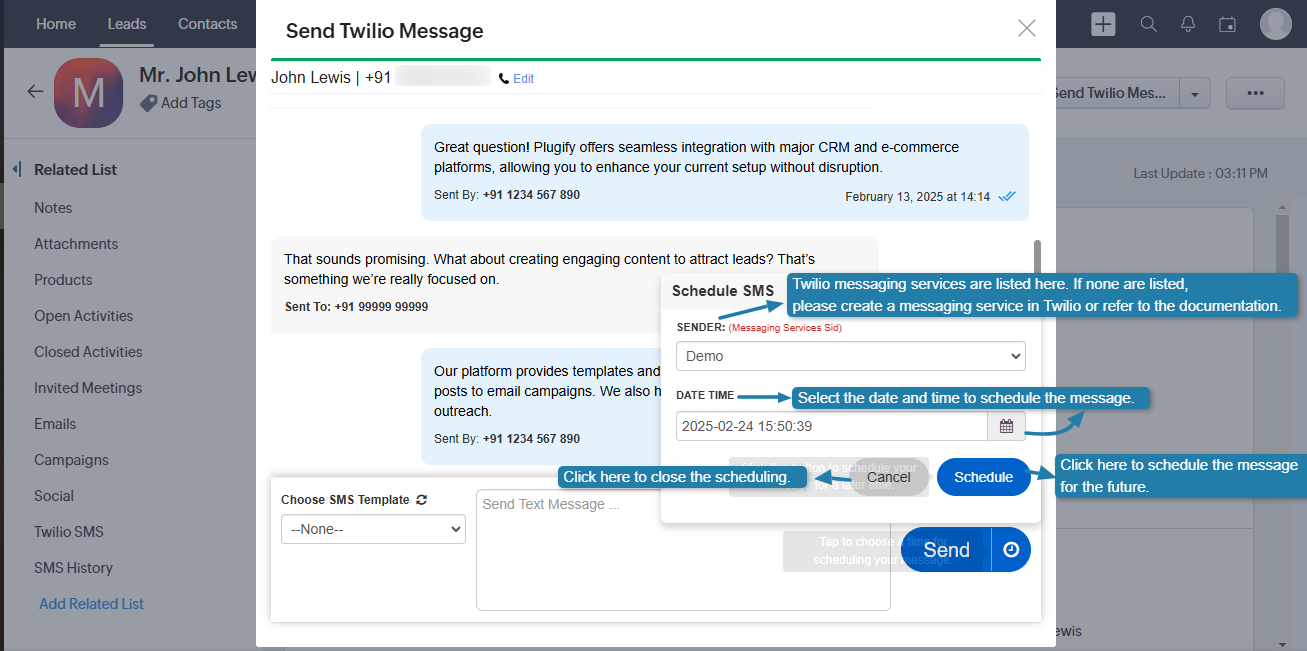
In this popup, you can:
- Select your Twilio sender number from the dropdown.
- Choose the Twilio sender number to schedule the SMS for future delivery.
📝 If the Sender dropdown appears empty, it means no messaging services have been created in your
Twilio account.
In this case, please create a messaging service in your Twilio Console, or contact our support team to help you set up this process.
In this case, please create a messaging service in your Twilio Console, or contact our support team to help you set up this process.
Step 11: Within each Lead record, you will find a related list called SMS
History.
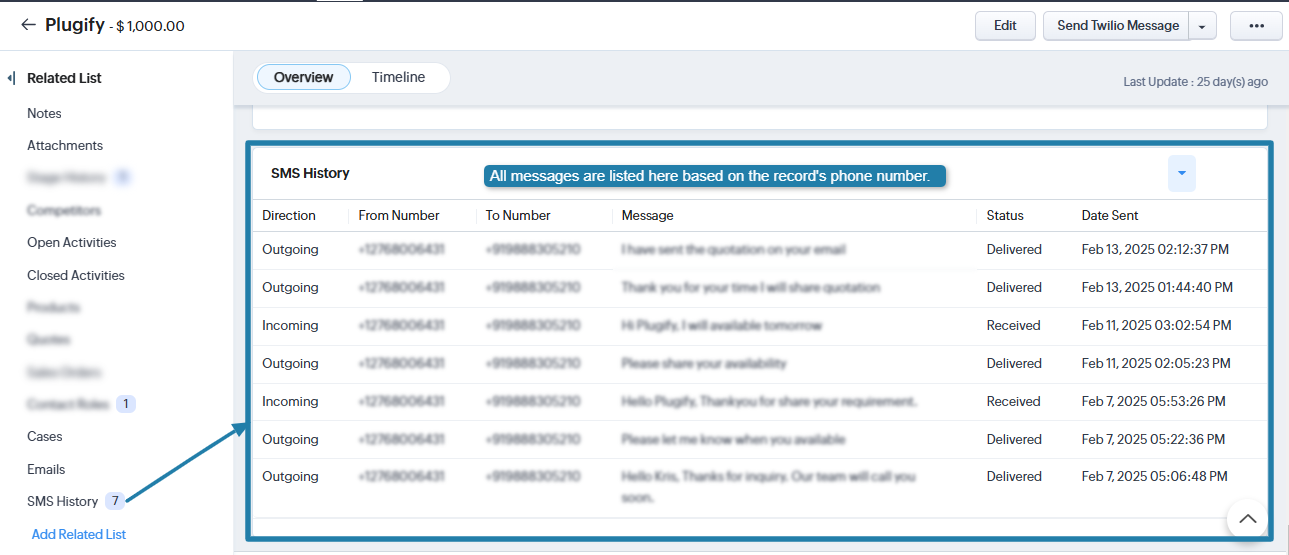
This section displays a complete log of outgoing and incoming SMS messages
associated with that specific lead’s phone number.
📄 Use this history to track past conversations, ensure message delivery, and maintain communication
records directly within the CRM.
Step 12: To create and manage predefined SMS messages, go to the SMS Template
module.
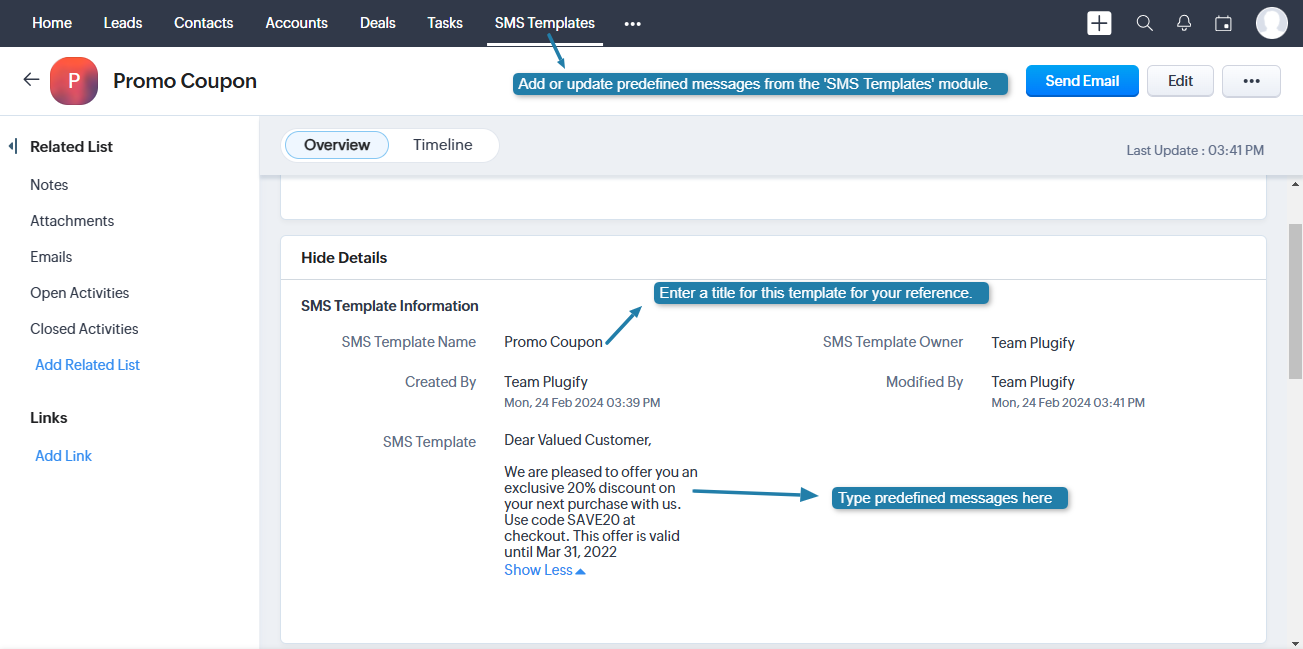
From this module, you can:
- Add new SMS templates with fixed message content.
- Edit or delete existing templates based on your communication needs.
These templates will appear in the template dropdown when sending SMS from modules like Leads, Contacts,
Accounts, and Deals.
Step 13: To send bulk SMS messages, follow the steps below:
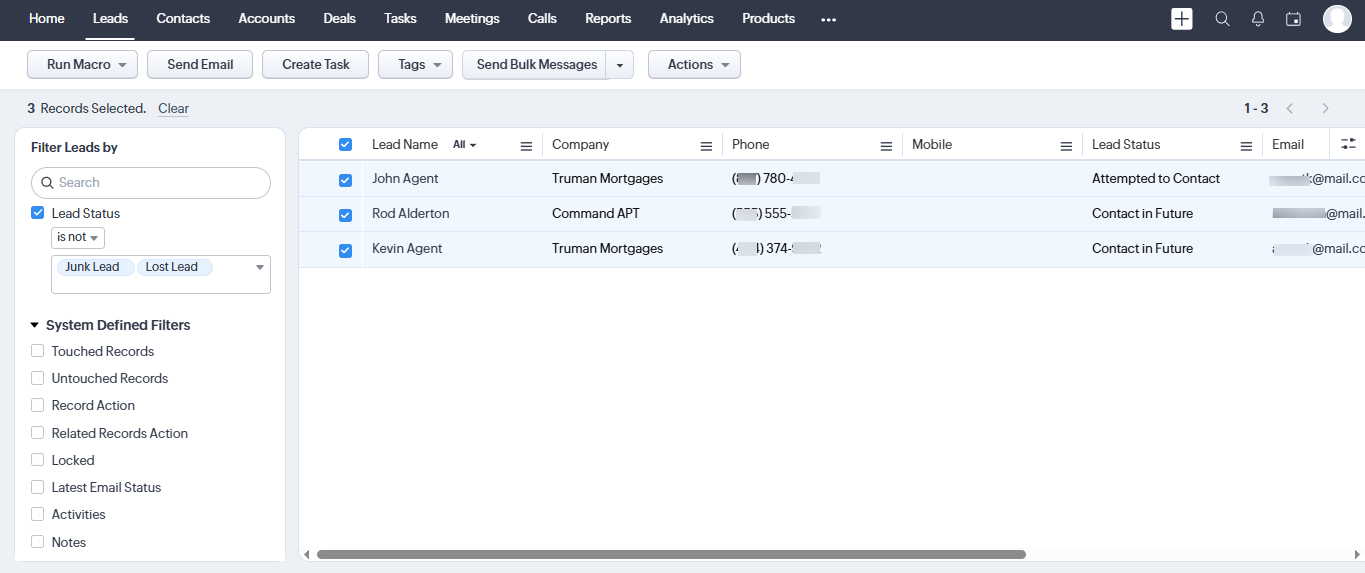
- Navigate to the Leads module.
- Select the desired lead records manually, or use filters to narrow down your selection.
- Once records are selected, click the "Mass Update" dropdown at the top.
- From the dropdown, click on "Send Bulk Messages".
This will open the Bulk SMS popup window, where you can send a message to all selected leads at once.
Send bulk messages by selecting multiple leads manually or using filters to target specific groups.
Step 14: Once the Bulk SMS window opens, you’ll see the selected leads listed on the left side. The list is divided into two sections:
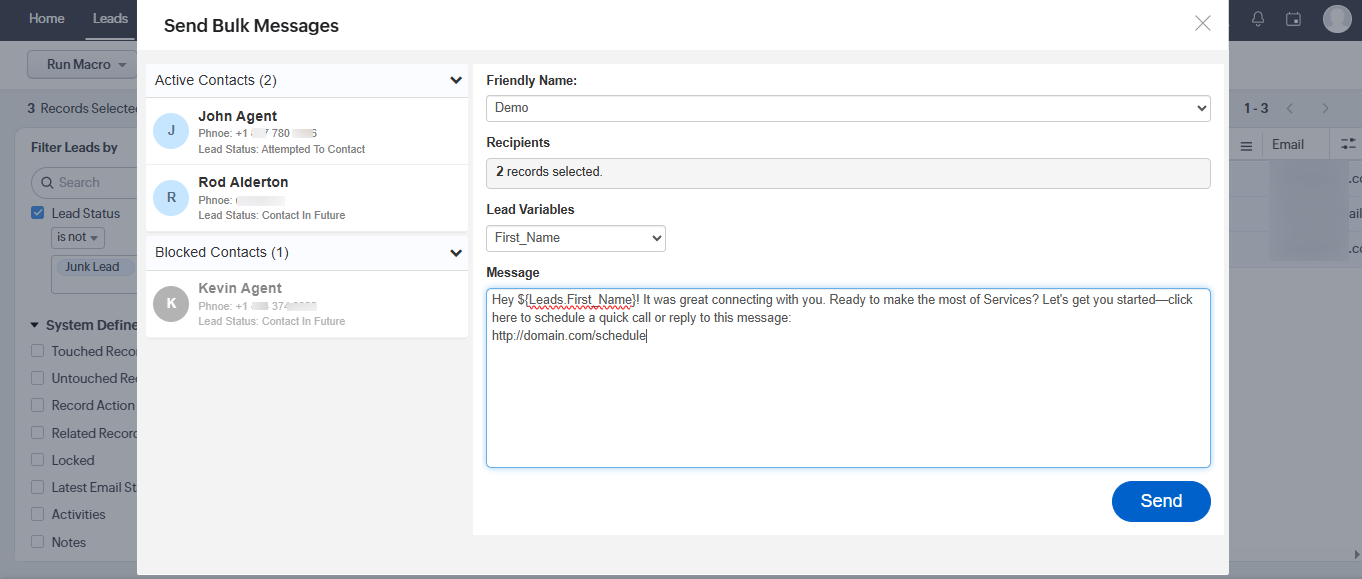
- Active Leads – Leads who have not opted out of SMS (i.e., "SMS Opt-out" is unchecked)
- Blocked Leads – Leads who have opted out of SMS (i.e., "SMS Opt-out" is checked)
These categories help you target only those who have consented to receive messages.
Let’s introduce the key features of the Bulk Messages interface:
- Friendly Name (Sender Service) Dropdown
- Displays the messaging services created under your Twilio account.
- Select the appropriate service for sending the message.
- Recipients Count
- Shows the total number of Active Leads selected for this bulk message.
- This number is based on the current filtered or selected leads in the Active Leads section.
- Lead Variables
- These are dynamic fields that can be inserted into your message (e.g., Lead Name, Company).
- Useful for personalizing each SMS.
- Message Box
- Type your message here.
- You can insert dynamic lead variables by selecting them from the Lead Variables dropdown.
- Blocked Leads
- Shows the number of leads who have opted out of receiving SMS messages.
- These leads will not receive any messages sent from this interface.
✅ Note: Make sure to craft your message carefully and include relevant variables to personalize communication.
Step 15: Within each Lead record, there is an "SMS Opt-out" checkbox field.
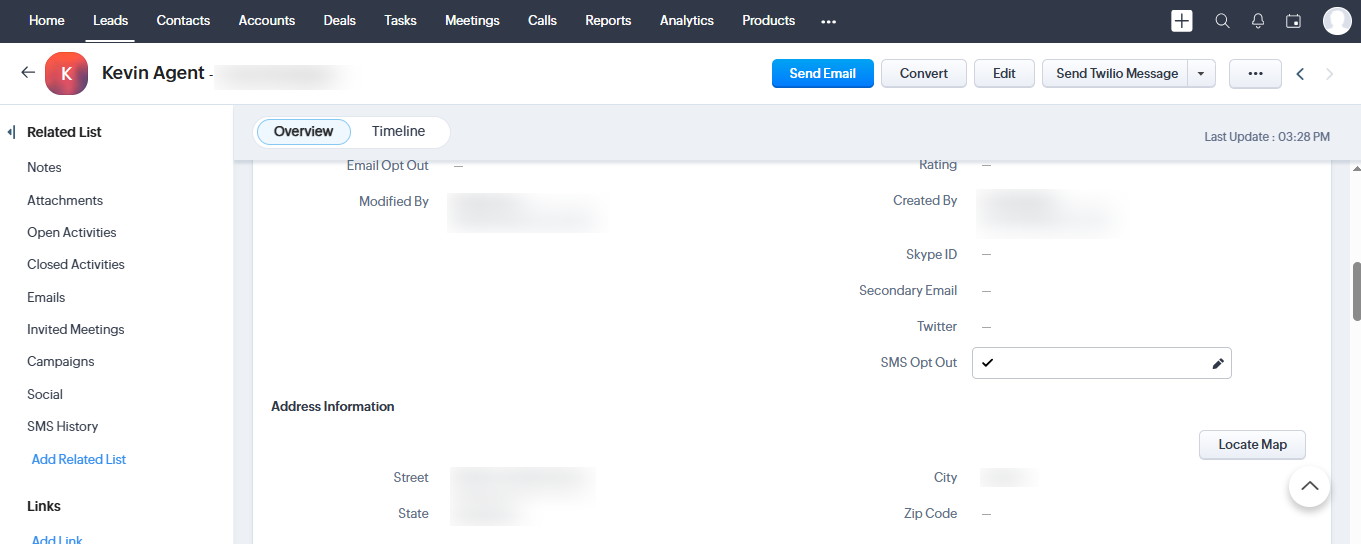
- When this checkbox is checked, the lead is marked as opted out of receiving SMS messages.
- When unchecked, the lead is considered eligible to receive SMS communications through the extension.
📌 This field helps maintain compliance with communication preferences and ensures messages are only sent to leads who have opted in.
| Country Name | Region Code |
|---|---|
| India | IN |
| United States | US |
| Canada | CA |
| United Kingdom | GB |
| Australia | AU |
| Germany | DE |
| France | FR |